![[Updated] 2024 Approved Elevate Your YouTube Gaming Content With Key FreeFire Hashtags](https://thmb.techidaily.com/7145ec69591f6ebc68facf261c1d68971298e27f3697b076251aa5b51f323de0.jpg)
"[Updated] 2024 Approved Elevate Your YouTube Gaming Content With Key FreeFire Hashtags"
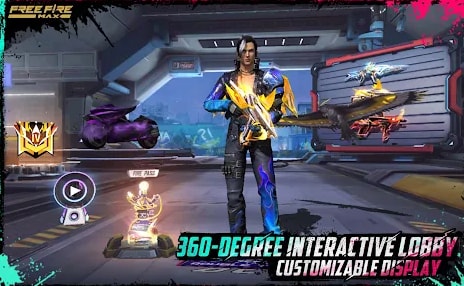
Elevate Your YouTube Gaming Content With Key FreeFire Hashtags
Are you a YouTube gaming streamer looking for the right hashtags for FreeFiree - a popular mobile game with millions of players worldwide? The right hashtag can help you reach a larger audience and make more people see your videos.
If yes, please read this article furtherly. We’ll provide you with a list of the 30 best FreeFire hashtags for YouTube and valuable tips to make your content more engaging.
Without any delay, let’s hit the road directly!
Best 30 FreeFire Hashtags In 2024
To make things easier and help you get started, we’ve compiled a list of the 30 best FreeFire hashtags for YouTube gaming videos. These tags are the most popular ones in 2024. It can aid you in reaching a wider audience and getting your clips seen by more people interested in this game.
- #freefire - ranked 100 on the Kparser tool
- #freefirelinggo - ranked 67 on the Kparser tool
- #freefirebrasil - rated 91% on the best-hashtags platform
- #freefirememe
- #garena
- #freefirenews
- #freefireyoutubegaming
- #freefireyoutubegamer
- #freefiregame
- #freefiregarena
- #garenaff
- #lasgrandes
- #freefiremobile
- #garenafreefireindonesia
- #freefirebooyah
- #freefiresquad
- #freefirestudio
- #freefireshare
- #garenafreefireofficial
- #garenafreefirelive
- #alphafreefire
- #freefirebattleground
- #freefiretournament
- #freefirebgid
- #freefiresquad
- #gaming
- #mobilelegends
- #freefirebr
- #garena
- #freefirehack
How To Optimize your YouTube Tags To Win More Views
Tags are one of the most important aspects of YouTube videos, yet creators often need to pay more attention to them. This is because YouTube uses them to categorize and organize videos and play a significant role in determining which videos are shown to which viewers.
So, if you want to reach the right audiences and get viral quickly, keep these things in mind when optimizing your YouTube tags, such as using relevant keywords, using all 500 characters, and avoiding duplicate tags.
Your gameplay footage will likely do most of the heavy lifting in terms of getting you in front of your target viewers, but there’s a reason why FreeFire tags are gaining so much popularity. These tags allow you to get in front of specific types of viewers and make it easier for people who are only interested in the gaming content you offer.
Give them a shot and see if they can help you take your gaming channel on YouTube to the next level. To learn more about YouTube tags and the tips and tricks for adding them to your videos, click here!
Bonus: Improve Your Gaming Recording Video With Filmora
If you’re a gamer who likes to record your gameplay and share with friends or build up a following on YouTube, then you know that getting high-quality videos is essential.
Fortunately, Filmora is there to assist you in creating engaging and eye-capturing gaming videos.
Here are some advanced features of Wonderdahre Filmora that can help you improve your gaming recording video:
Screen Recorder: With its screen recorder, you can simultaneously record your gaming screen and webcam. Additionally, you can show the mouse while recording and set the Frame Rate, Quality, and Record Timer.

Audio Ducking: Audio ducking lets you automatically lower the volume of background noise in your gaming videos when someone is speaking and is a great way to ensure that your audio is always clear and easy to understand.
Speed Ramping: Speed ramping features allow you to change the speed of your gaming videos at different points and add excitement or drama for your viewers.
Export: When exporting, you can share your finished project directly to YouTube with just a few clicks. Besides that, you can save it on your device or phone.
With these features and tools in Filmora , you can create a video that instantly grabs the viewers’ attention and keeps them engaged till the end.
So, what are you waiting for? Get started using Filmora for your YouTube gaming video editing needs!
Free Download For Win 7 or later(64-bit)
Free Download For macOS 10.14 or later
Conclusion
In this comprehensive guide, we’ve compiled a complete list of the 30 best gaming tags for YouTube FreeFire to help you reach a bigger audience. We’ve also provided some tips to improve your gaming recording and optimize your YouTube tags.
The hashtags and tips discussed should help you formulate your strategy when gunning for the top in the YouTube gaming world. Of course, in the end, your skill as a gamer will determine how fast you can gain subscribers, but these suggestions will aid you in getting there much quicker.
Hopefully, this article helped resolve your query, and you can now use the right hashtags for YouTube gaming videos.
Cut to Impact: In-Depth Youtube Video Editing Mastery
How to Edit Youtube Videos by the YouTube Video Editor

Richard Bennett
Mar 27, 2024• Proven solutions
Note: From 20th September 2017 users will no longer be able to use the complimentary editing suite. Check the best YouTube video editor alternatives from this complete guide. Now, it is back again.
Video editing usually requires a fair amount of technical knowledge and professional software. But YouTube has introduced its new YouTube Video Editor. It’s deceptively simple compared to the traditional desktop editing programs.
If you haven’t tried the YouTube editor , it’s time to get started.
It’s easy to learn and the guide below will give you an introduction for editing videos on YouTube.
You May Also Like:
Royalty free music for YouTube Videos >>
Best Screen Recorders for YouTube >>
YouTube Video Dimensions/Size: Guide for Upload Settings >>
The Best Video Editors for YouTube >>
How to edit a YouTube video with Filmora
If you want to have more controls on editing YouTube video, here we recommend using Filmora .
You can use it to trim/cut/split YouTube videos with handy tools. It also offer more than 50 royal free music to use. Various video filters and effects are available to make your videos amazing. The best part is you can apply animated text/titles to videos like a pro. After editing, you can directly upload videos to YouTube.
Now, download it now to have a try!
 Download Mac Version ](https://tools.techidaily.com/wondershare/filmora/download/ )

How to Use YouTube Video Editor to Edit Video on YouTube
Step 1. Get access to YouTube Video Editor
Sign in to your YouTube (or Google) account. To get access to YouTube Video Editor, you can go directly to YouTube studio (video editor) . Or click avatar icon in your YouTube site > YouTube Studio.
Learn more about Upload MP3 to YouTube

Step 2. Add your videos to the timeline
After getting to the editor, all your YouTube videos will appear. If you want to add a clip from the pool of videos into the project, simply drag it onto the timeline or hit the plus icon in the top right hand corner of each clip. You can also add any YouTube videos that were uploaded with a “Creative Commons” license.
To do this, go to the CC tab, find a video and drag it to the timeline.

Looking for best YouTube video editor alternatives? Check this complete guide here >>
Step 3. Edit the videos as you like
With the YouTube video editor, you can quick fix your videos, add audio track of your video, add texts, use various filters and more. Below is a detailed guide on how to use YouTube video Editor.
#1 Trim/Cut/Split video
To cut or split your video, hover over the target clip and hit the scissor icon to cut the clip into pieces. You can also cursor over the edge of your video in the timeline and drag the handle to shorten or trim your video.

#2 Change video settings
YouTube Video Editor also provides the “Quick fixes” function which does a quick analysis of the video and tweaks its color, brightness, and contrast settings automatically.
You can just double click the video to enter the “Quick fixes” tab and easily change brightness and contrast, add slow motion and pan zoom effect, and stabilize, audio fix or rotate video.

#3 Add filters
You can also add stunning video filters provided by this editor. To get access this function, double click the video and switch to the “Filter” tab.

#4 Add text to video
To add text to video, go to the “Text” tab, tick “Enable text” and enter the text to the text column. Then customize the font, size, color, position of the text as you like.

#5 Add music to video
YouTube also allows you to swap out the audio with one of its licensed tracks. To do this, go back to the main interface of the editor and click the Audio tab. Then select a song from the library and either drag it to the soundtrack timeline or press the plus sign to the right of each title.

Note: You should note that some are songs are subject to licensing agreements, which means YouTube will automatically add advertisements to the video clip.
Another short coming is that you can’t edit the audio track at all. If a song is longer than your video, you can do nothing but let it play from the beginning until your video stops.
#6 Add transitions to video
If several video clips have been added to the timeline, you need transition to make the whole project smoother. To add transition, go to the Transition tab and choose from 16 transition effects.

YouTube Video Editor is really easy to use, but it only provides some basic video editing functions and is really easy to crash when dealing with large file. If you want to make your video more professional, try Wondershare Filmora .
This desktop video editing tool can help you easily complete video editing tasks.
Download it now to have a try!
Download Mac Version ](https://tools.techidaily.com/wondershare/filmora/download/ )
Richard Bennett
Richard Bennett is a writer and a lover of all things video.
Follow @Richard Bennett
Richard Bennett
Mar 27, 2024• Proven solutions
Note: From 20th September 2017 users will no longer be able to use the complimentary editing suite. Check the best YouTube video editor alternatives from this complete guide. Now, it is back again.
Video editing usually requires a fair amount of technical knowledge and professional software. But YouTube has introduced its new YouTube Video Editor. It’s deceptively simple compared to the traditional desktop editing programs.
If you haven’t tried the YouTube editor , it’s time to get started.
It’s easy to learn and the guide below will give you an introduction for editing videos on YouTube.
You May Also Like:
Royalty free music for YouTube Videos >>
Best Screen Recorders for YouTube >>
YouTube Video Dimensions/Size: Guide for Upload Settings >>
The Best Video Editors for YouTube >>
How to edit a YouTube video with Filmora
If you want to have more controls on editing YouTube video, here we recommend using Filmora .
You can use it to trim/cut/split YouTube videos with handy tools. It also offer more than 50 royal free music to use. Various video filters and effects are available to make your videos amazing. The best part is you can apply animated text/titles to videos like a pro. After editing, you can directly upload videos to YouTube.
Now, download it now to have a try!
Download Mac Version ](https://tools.techidaily.com/wondershare/filmora/download/ )
How to Use YouTube Video Editor to Edit Video on YouTube
Step 1. Get access to YouTube Video Editor
Sign in to your YouTube (or Google) account. To get access to YouTube Video Editor, you can go directly to YouTube studio (video editor) . Or click avatar icon in your YouTube site > YouTube Studio.
Learn more about Upload MP3 to YouTube
Step 2. Add your videos to the timeline
After getting to the editor, all your YouTube videos will appear. If you want to add a clip from the pool of videos into the project, simply drag it onto the timeline or hit the plus icon in the top right hand corner of each clip. You can also add any YouTube videos that were uploaded with a “Creative Commons” license.
To do this, go to the CC tab, find a video and drag it to the timeline.
Looking for best YouTube video editor alternatives? Check this complete guide here >>
Step 3. Edit the videos as you like
With the YouTube video editor, you can quick fix your videos, add audio track of your video, add texts, use various filters and more. Below is a detailed guide on how to use YouTube video Editor.
#1 Trim/Cut/Split video
To cut or split your video, hover over the target clip and hit the scissor icon to cut the clip into pieces. You can also cursor over the edge of your video in the timeline and drag the handle to shorten or trim your video.
#2 Change video settings
YouTube Video Editor also provides the “Quick fixes” function which does a quick analysis of the video and tweaks its color, brightness, and contrast settings automatically.
You can just double click the video to enter the “Quick fixes” tab and easily change brightness and contrast, add slow motion and pan zoom effect, and stabilize, audio fix or rotate video.
#3 Add filters
You can also add stunning video filters provided by this editor. To get access this function, double click the video and switch to the “Filter” tab.
#4 Add text to video
To add text to video, go to the “Text” tab, tick “Enable text” and enter the text to the text column. Then customize the font, size, color, position of the text as you like.
#5 Add music to video
YouTube also allows you to swap out the audio with one of its licensed tracks. To do this, go back to the main interface of the editor and click the Audio tab. Then select a song from the library and either drag it to the soundtrack timeline or press the plus sign to the right of each title.
Note: You should note that some are songs are subject to licensing agreements, which means YouTube will automatically add advertisements to the video clip.
Another short coming is that you can’t edit the audio track at all. If a song is longer than your video, you can do nothing but let it play from the beginning until your video stops.
#6 Add transitions to video
If several video clips have been added to the timeline, you need transition to make the whole project smoother. To add transition, go to the Transition tab and choose from 16 transition effects.
YouTube Video Editor is really easy to use, but it only provides some basic video editing functions and is really easy to crash when dealing with large file. If you want to make your video more professional, try Wondershare Filmora .
This desktop video editing tool can help you easily complete video editing tasks.
Download it now to have a try!
Download Mac Version ](https://tools.techidaily.com/wondershare/filmora/download/ )
Richard Bennett
Richard Bennett is a writer and a lover of all things video.
Follow @Richard Bennett
Also read:
- [New] Breakdown of Profit Earning Potential From Each YouTube Sponsored Post, In 2024
- [New] In 2024, Capturing Life in Motion Top 9 Smartphone Props for Dynamic Cinematography
- [New] In 2024, Easy YouTube File Transfer Techniques
- [New] Maximizing Video Game Channel Revenue
- [New] Thrifty Approaches to YouTube Video Card Production
- [New] Unraveling The Top 9 Free Video Logo Creation Software List
- [New] Unveiling the 8 Leading No-Monetary-Cost Video Tools for Editors
- 2024 Approved Ultimate Guide to Applying VHS Filters on Computers
- In 2024, Top 7 Phone Number Locators To Track Infinix Note 30i Location | Dr.fone
- iSpoofer is not working On Vivo S17t? Fixed | Dr.fone
- New Omegle Uncovered Delving Into Internet-Based Social Sessions Security Landscape for 2024
- Step-by-Step Guide: Local Setup of LLAMA Version 2
- Unraveling the Legality of Upload Photographs
- Title: [Updated] 2024 Approved Elevate Your YouTube Gaming Content With Key FreeFire Hashtags
- Author: Steven
- Created at : 2024-10-27 17:01:42
- Updated at : 2024-10-29 17:50:56
- Link: https://facebook-record-videos.techidaily.com/updated-2024-approved-elevate-your-youtube-gaming-content-with-key-freefire-hashtags/
- License: This work is licensed under CC BY-NC-SA 4.0.