
Outlining Operational Offshoots for 2024
Outlining Operational Offshoots
Nowadays, having a strong online presence is more important than ever. One of the best ways to do that is to create engaging content for your YouTube channel, and you can achieve this by adding a solid intro and outro to your videos.
To keep viewers engaged, the outros on your videos must be strong and captivating to make a positive impression and leave viewers wanting more.
In this article, we’ll discuss how to create news outro templates for your videos or get an editable or non-editable template online.
Part 1. Before Starting, Learn What Is a Good YouTube Outro?
Before we investigate where to find an appropriate News Style Outro for your video in Part 2, let’s figure out what elements a good outro should include firstly.
A good outro will typically include a call to action, such as subscribing to a channel, checking out a website, or following on social media. You can also use engaging music or make your outros visually appealing with graphics, animations, or both to keep your viewers hooked.
Furthermore, it should include a brief summary of the video, and what viewers can expect for the things to come. You can find outros templates online or make your own outstanding YouTube outros in just a few clicks.
Part 2. Recommendation: Where Can You Find News Style Outro?
Now that you’ve understood what a good YouTube outro is, you might wonder where you can find News Style outros for your videos/presentations to add a bit of flair.
Multiple platforms offer editable or non-editable news styles outros to content creators. Below we’ve recommended top websites/platforms where you can get your required templates without any issues. Some even offer non-copyright content to their users.
Editable News Outro Template Websites
An editable news outro template can provide a quick and easy way to create or customize an outro that is both professional and engaging. Here are four websites we have chosen for you to find editable news outro templates.
Filmstock
Filmstock is a platform offering free and paid editable templates for content creators. With dozens of editable templates to choose from on Filmstock , you can find the perfect news style outro for your videos in just a few clicks. First, however, you need to install Filmora on your PC to use the platform.
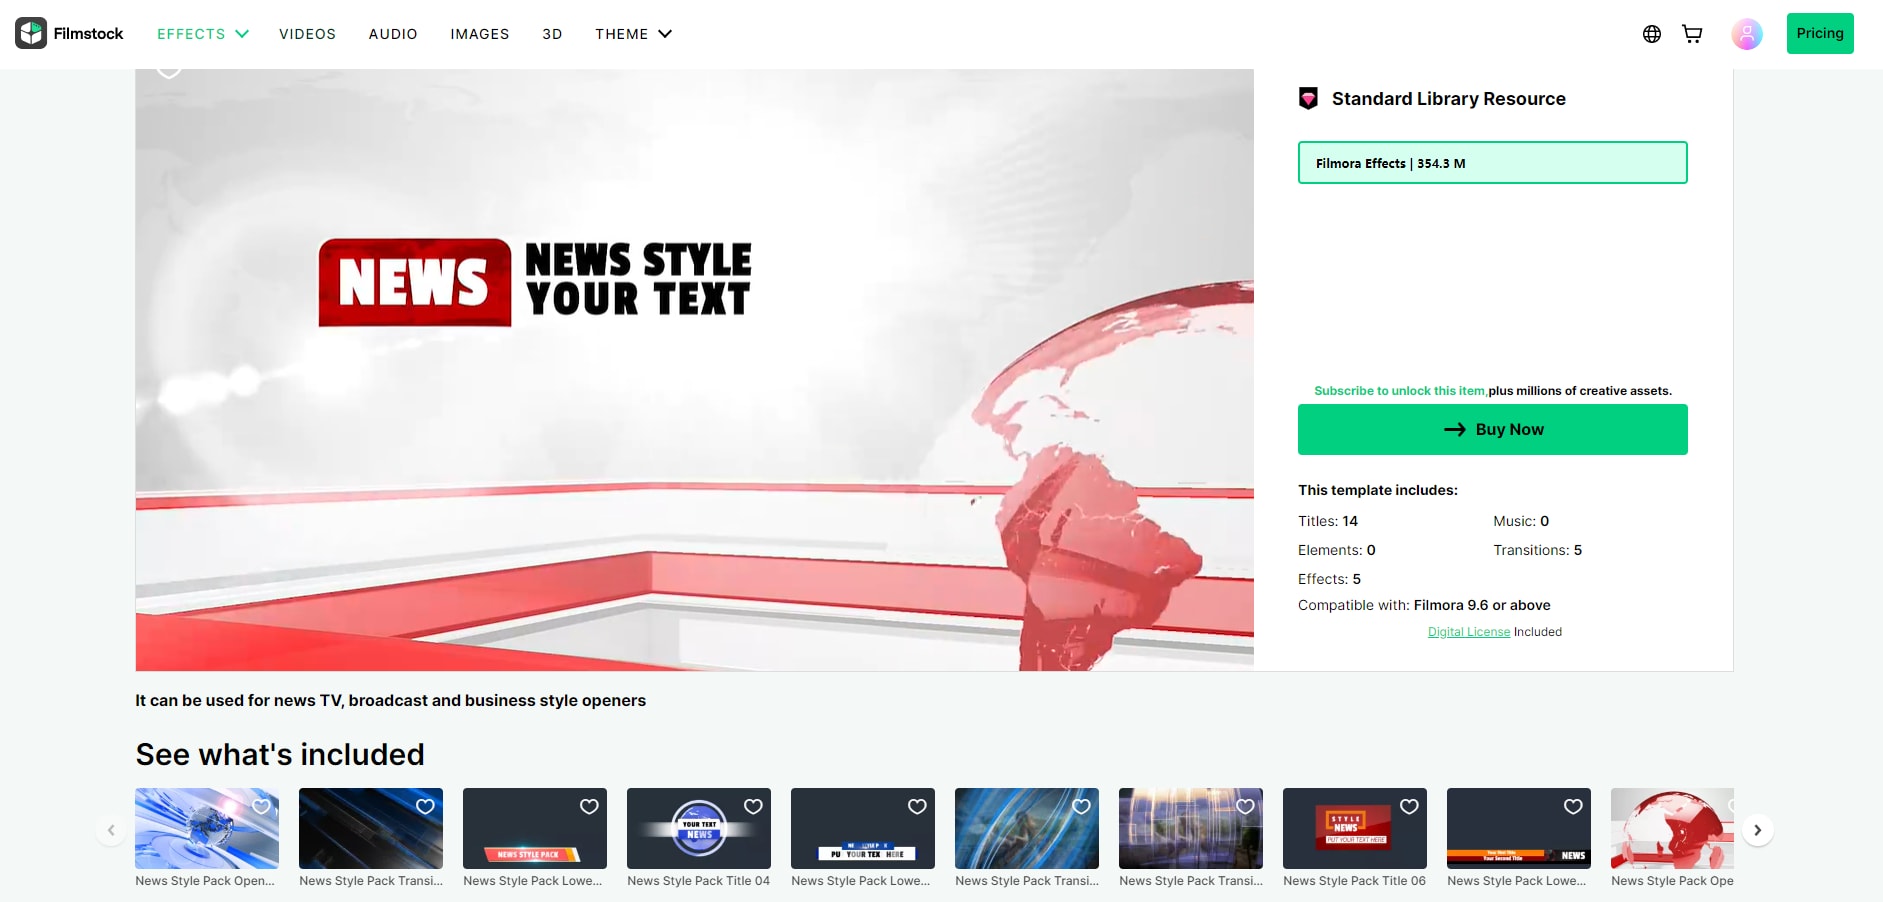
Filmora is a popular video editor with a built-in filmstock library offering hundreds of non-copyright editable templates for every occasion. With the software, you can find and add your news style outros to your videos with just a few clicks. The only disadvantage is that it isn’t completely free. The paid version offers two options: A standard plan that costs $9.99 per month and a Premium plan that will cost you $49.99 per month.
You can also find detailed video tutorials to facilitate your video creation through Filmora and Filmstock’s official YouTube Channels, as well as video sources set presentation on the two channels. Here is an example of News Set video on Filmora’s YouTube Channel. Go to watch it and check are there any ideal news outro!
Video of News Set in Filmora Effects Store
Canva
Canva is a user-friendly graphic design free and paid tool that is quickly becoming a popular choice for businesses of all sizes. Canva offers a range of templates for creating professional-looking designs.
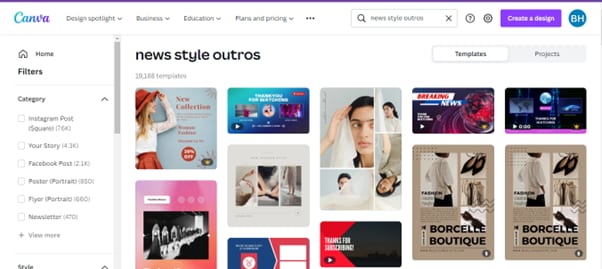
With a wide range of templates to choose from, you can easily find one that fits your needs and style. Best of all, you can create your outro template in minutes without hiring a designer or spending hours learning complex design software.
The software is easy-to-use and does not require any editor to customize and use the templates. The paid version is divided into 2 tiers: Canva Pro ($54.99 per year) and Canva for team ($84. 90/year). One disadvantage of the Canva free version is that it is limited resolution options when exporting your file.
Flexclip
Flexclip is a free, powerful, and easy-to-use online video maker that helps you create beautiful and engaging content for your business. With Flexclip, you can easily create editable news style outros for your videos from scratch or choose a template and edit it according to your requirements.

You can add text, music, elements, overlays, and branding to your templates to make them more stunning and captivating.
The platform offers 3 paid plans starting at $8.99/month. The con here is that the free version is only limited to the export quality of 480p, single royalty-free stock use, and 12 projects limit.
Placeit
Placeit is an online editor giving you the ability to create and customize your video content in no time. The editor also includes a stock image library, giving you access to several customizable templates.
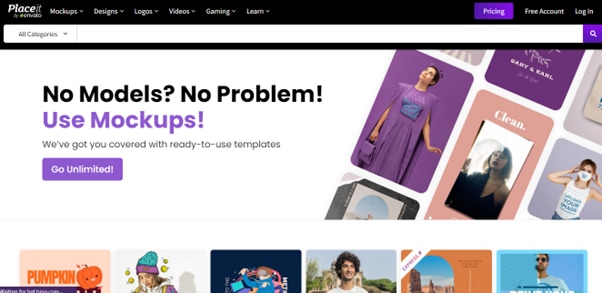
Placeit is easy to use and offers a variety of templates for different purposes, including outros for news stories, video blogs, and even gaming videos. The platform offers an unlimited subscription plan starting from $7.47 /month.
However, the design rendering process of the editor is slow, there is no AI tool, and you even cannot import fonts that are not available on the platform.
Non-Editable News Outro Template Websites
Some platforms offer non-editable high-resolution news outros that you can integrate into your videos using software programs like Filmora (guidance in Part 3), After Effects, etc.
Storyblock
Searching for high-quality templates for your next project?Storyblock is a website that comes with royalty-free, non-customizable news style outros.
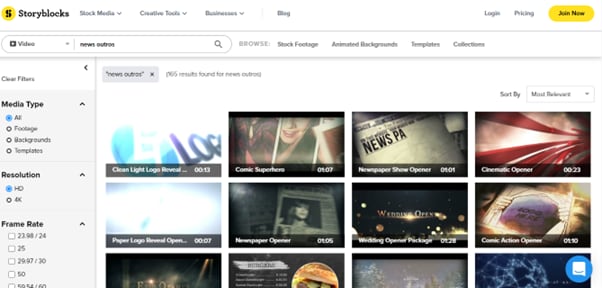
You can use these templates to create high-quality news intros and outros for your podcast or videos. The platform offers two pricing plans for individual content creators, starting at $15 per month. While businesses can customize their plans as per their requirements.
Limitations of the Storyblock are that the footage quality is very poor in the free version, and the paid versions might be tricky to avail sometimes.
Videvo
Videvo is a great resource for anyone looking for royalty-free video templates. They have over 300,000 free and premium videos, which you can download in clips or full with 4K resolution. However, their stock library is not much vast. The platform comes with a two-tier subscription plan starting from $14.99/month or $144/year.
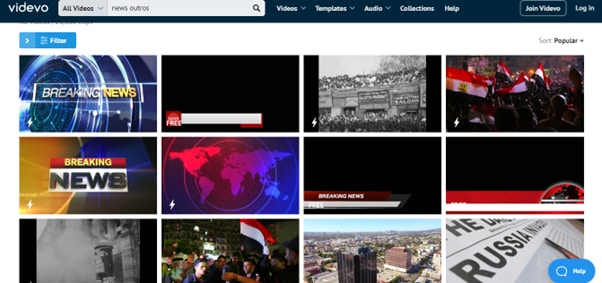
You can find templates for both commercial and non-commercial use, so whatever your needs are, Videvo is likely to have a template that will work for you, i.e., news style. Some features of the platform include high-resolution download options, numerous music, sound effects, images and videos library, and a video compression option.
Videezy
Videezy is a royalty-free video site that offers free and premium video templates. The website has a variety of options to choose from, including news style outros, all of which are geared towards creating engaging content.
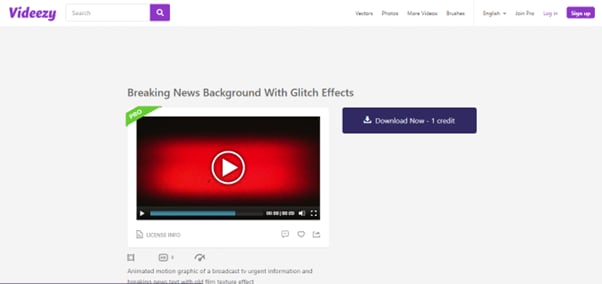
The templates are all ready-made and royalty-free. You can download them for use in your own projects and attach them to your video using any video editing app/software.
The pricing of the platform starts at $19/file, which might be expensive for some users. Moreover, in the free version, too many ads are displayed.
Shutterstock
Shutterstock has various affordable, royalty-free outro templates that you can use for your video/podcast. With a wide selection of styles and price points, this platform has the perfect content for your needs.
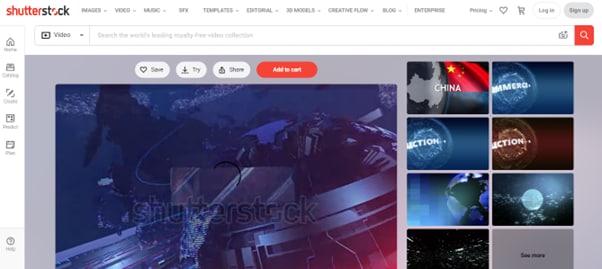
On Shutterstock, the free trial only offers 10 images, and you will be charged $0.22-$14.50/image once the trial limit is over. On the other hand, the Extended license will cost you $67.96-$99.50. The downside is that you have to purchase the content pack separately.
iStock
iStock is a premium website offering royalty-free stock photos, illustrations, and videos divided into numerous categories for easy access. The platform also offers a variety of non-editable news outro templates that you can add to your videos or podcasts.
The free trial on the platform is limited to 10 images, and after that, you will be charged $0.22-$9.90/image, while the Extended license will cost you $144-$216. The support system on the platform is slow and doesn’t respond on time.
Part 3. A Bonus Tip: How To Edit Your News Outro For Your YouTube Video?
After knowing the websites providing News Style Outro, we hope you can find an ideal outro successfully. However, how to use the material you have found, integrate it into your YouTube video, and improve the quality of it?
Like mentioned before, we highly recommend Filmora to fulfill all your editing needs and even provide royalty-free templates to use. Below are the steps to edit your news outros and make your content more appealing. Let’s start it without any hassle:
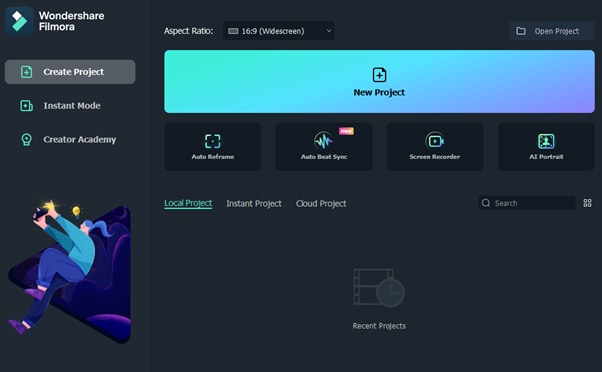
Step1 Download Filmora software from the official website and install it on your PC. Launch the software and click “New Project.”
Step2 Drag and drop your media file or import it using the “Click Here to Import Media File” option. Now, drag your file and drop it in the Timeline.
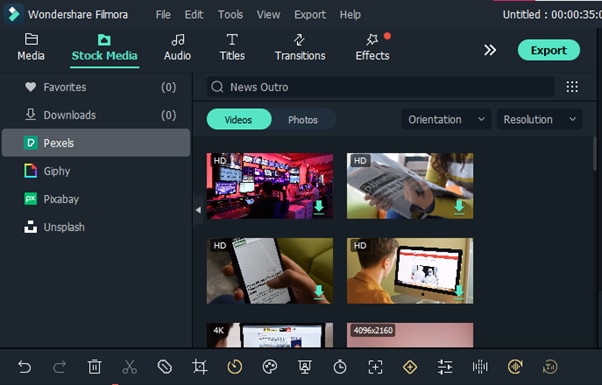
Step3 Adjust your clip in the Timeline and click the “Stock Media” option. Search for “News Outros,” select the one you like, and add it to the Timeline.
Step4 Next, adjust the template on your video, and once you are satisfied, click the “Export” option. Finally, do the necessary settings and click “Export” again or share your video directly to YouTube.
Free Download For Win 7 or later(64-bit)
Free Download For macOS 10.14 or later
Conclusion
In this article, we’ve provided a detailed guide on how to create news outro templates with simple and easy-to-follow instructions. We also discussed various platforms/editors where you can find customizable and non-customizable templates.
Hopefully, you find this guide informative and can now create strong news style outros for your videos.
Canva
Canva is a user-friendly graphic design free and paid tool that is quickly becoming a popular choice for businesses of all sizes. Canva offers a range of templates for creating professional-looking designs.
With a wide range of templates to choose from, you can easily find one that fits your needs and style. Best of all, you can create your outro template in minutes without hiring a designer or spending hours learning complex design software.
The software is easy-to-use and does not require any editor to customize and use the templates. The paid version is divided into 2 tiers: Canva Pro ($54.99 per year) and Canva for team ($84. 90/year). One disadvantage of the Canva free version is that it is limited resolution options when exporting your file.
Flexclip
Flexclip is a free, powerful, and easy-to-use online video maker that helps you create beautiful and engaging content for your business. With Flexclip, you can easily create editable news style outros for your videos from scratch or choose a template and edit it according to your requirements.
You can add text, music, elements, overlays, and branding to your templates to make them more stunning and captivating.
The platform offers 3 paid plans starting at $8.99/month. The con here is that the free version is only limited to the export quality of 480p, single royalty-free stock use, and 12 projects limit.
Placeit
Placeit is an online editor giving you the ability to create and customize your video content in no time. The editor also includes a stock image library, giving you access to several customizable templates.
Placeit is easy to use and offers a variety of templates for different purposes, including outros for news stories, video blogs, and even gaming videos. The platform offers an unlimited subscription plan starting from $7.47 /month.
However, the design rendering process of the editor is slow, there is no AI tool, and you even cannot import fonts that are not available on the platform.
Non-Editable News Outro Template Websites
Some platforms offer non-editable high-resolution news outros that you can integrate into your videos using software programs like Filmora (guidance in Part 3), After Effects, etc.
Storyblock
Searching for high-quality templates for your next project?Storyblock is a website that comes with royalty-free, non-customizable news style outros.
You can use these templates to create high-quality news intros and outros for your podcast or videos. The platform offers two pricing plans for individual content creators, starting at $15 per month. While businesses can customize their plans as per their requirements.
Limitations of the Storyblock are that the footage quality is very poor in the free version, and the paid versions might be tricky to avail sometimes.
Videvo
Videvo is a great resource for anyone looking for royalty-free video templates. They have over 300,000 free and premium videos, which you can download in clips or full with 4K resolution. However, their stock library is not much vast. The platform comes with a two-tier subscription plan starting from $14.99/month or $144/year.
You can find templates for both commercial and non-commercial use, so whatever your needs are, Videvo is likely to have a template that will work for you, i.e., news style. Some features of the platform include high-resolution download options, numerous music, sound effects, images and videos library, and a video compression option.
Videezy
Videezy is a royalty-free video site that offers free and premium video templates. The website has a variety of options to choose from, including news style outros, all of which are geared towards creating engaging content.
The templates are all ready-made and royalty-free. You can download them for use in your own projects and attach them to your video using any video editing app/software.
The pricing of the platform starts at $19/file, which might be expensive for some users. Moreover, in the free version, too many ads are displayed.
Shutterstock
Shutterstock has various affordable, royalty-free outro templates that you can use for your video/podcast. With a wide selection of styles and price points, this platform has the perfect content for your needs.
On Shutterstock, the free trial only offers 10 images, and you will be charged $0.22-$14.50/image once the trial limit is over. On the other hand, the Extended license will cost you $67.96-$99.50. The downside is that you have to purchase the content pack separately.
iStock
iStock is a premium website offering royalty-free stock photos, illustrations, and videos divided into numerous categories for easy access. The platform also offers a variety of non-editable news outro templates that you can add to your videos or podcasts.
The free trial on the platform is limited to 10 images, and after that, you will be charged $0.22-$9.90/image, while the Extended license will cost you $144-$216. The support system on the platform is slow and doesn’t respond on time.
Part 3. A Bonus Tip: How To Edit Your News Outro For Your YouTube Video?
After knowing the websites providing News Style Outro, we hope you can find an ideal outro successfully. However, how to use the material you have found, integrate it into your YouTube video, and improve the quality of it?
Like mentioned before, we highly recommend Filmora to fulfill all your editing needs and even provide royalty-free templates to use. Below are the steps to edit your news outros and make your content more appealing. Let’s start it without any hassle:
Step1 Download Filmora software from the official website and install it on your PC. Launch the software and click “New Project.”
Step2 Drag and drop your media file or import it using the “Click Here to Import Media File” option. Now, drag your file and drop it in the Timeline.
Step3 Adjust your clip in the Timeline and click the “Stock Media” option. Search for “News Outros,” select the one you like, and add it to the Timeline.
Step4 Next, adjust the template on your video, and once you are satisfied, click the “Export” option. Finally, do the necessary settings and click “Export” again or share your video directly to YouTube.
Free Download For Win 7 or later(64-bit)
Free Download For macOS 10.14 or later
Conclusion
In this article, we’ve provided a detailed guide on how to create news outro templates with simple and easy-to-follow instructions. We also discussed various platforms/editors where you can find customizable and non-customizable templates.
Hopefully, you find this guide informative and can now create strong news style outros for your videos.
Crafting Timeless Videos with Retro Filmmaking Skills
How to Create Vintage Videos: A Comprehensive Tutorial

Richard Bennett
Mar 27, 2024• Proven solutions
“Every accomplishment starts with a decision to try.” – A Vintage Thought

Vintage videos are ultimately the retro videos you have ever imagined. The look is highly inspirational in itself. The vintage effect in photography and videos results in a must-see look that everyone wants to capture all day long. The meaning of vintage is ‘the time when something of quality was produced.’ When something is called retro, it means old, recognized, and essential. Vintage also resembles love apart from videos and photos. All in all, it’s a positive and result-oriented thing to carry on in your videos. And this is what we want to mention in this post relating to the creation of vintage videos.
Here are some vintage-style video ideas for you to have a look at.
- Part 1: What to Consider When Shooting a Vintage Video?
- Part 2: How to Create a Stunning Vintage Video?
- Part 3: Tips to Make Your Vintage Videos Stand Out
What to Consider When Shooting a Vintage Video?
Vintage videos are kind of old school vibes and must be shooting accordingly by keeping in mind the following points. These are a sort of expert tips given by photographers based on their practical experience. First of all, you have to understand that a video can be made vintage, but you can’t change the actual environment of shooting. Some editing always involves there in every project out there. Still, the tips given below will help you a lot in creating a retro look.
Use Vintage Lenses
The very first helpful tip is to use a vintage lens. They allow chromatic aberration by distorting colors around the frame. Furthermore, you can find various kinds of lenses in terms of a vintage effect.
Decrease Contrast
Do the correct color grading by reducing the contrast a little bit. You must not level the retro videos in black or white or like-new videos. You can simply add a contrasting effect and then reduce it to have that vintage look.
Keep it a little soft
If you have ever noticed, the vintage videos are a little soft and look like degraded with time. It’s a result of decreased sharpness in the camera’s menu settings. You can even add a slight blur to the final video or simply use recognized software made for video editing .
Brighten up the black levels
Lots of black points in the video are not ideal for a vintage effect. The suitable approach is to bring up black levels and make it dark gray instead of inky black. This look can be achieved either by levels effect or curves effect in your editing software.
Reduce Saturation levels
Bringing down the saturation levels is another tip to create a vintage effect. The old videos are also absent in bright colors. Don’t go too crazy about reduction as 20%-30% saturation level is more than enough.
How to Create a Stunning Vintage Video?
What you need to get started as both beginner and professional is Wondershare Filmora Video Editor. It is a highly recommended software to create vintage videos. The intuitive user interface and lots of editing functions are helpful for a video editor. It has both primary as well as advanced editing programs to check. It has various advanced color tuning tools to promote the making of original videos. It features tint, temperature, Vignette, 3D Luts, Lights, and so on.


Steps for the vintage effect to videos on Wondershare Filmora Video Editor
Step 1: Upload video & make specific changes

The very step is to add the video by clicking the + icon. We have added the three sample videos from the library of Wondershare Filmora itself. Adjust them in the timeline as per your requirements.
After doing all the essential editing functions, click on the Effects tab given at the upper-left corner. Simply type the word Old in the Search tab.
The Old Video filter will immediately appear in the list of filters. Tap the “+” icon in Old Video filter to add to the timeline. Drag its ends right or left to adjust the duration.
Step 2: Apply White & Black Filters

The second step is to apply the Black & White filters. Go to the Effects tab and explore five Black & White filters available. Each of these filters is quite different and must be applied accordingly. Check the aesthetic of your video clip before any filter application to retro videos.
Step 3: Add the Sun Kissed or Sepia Tone Rise Filters to the video clip

There are various other categories of filters you can apply, such as Retro, Sun Kissed, and Sepia Tone, etc. The features of Filmora also present several subcategories such as Faux Film or Shake.

On the other hand, the subcategory of Sepia Tone features Sun-Kissed & Rise Filters to stimulate sepia-tinted texture and recreate the old visual style. The Sun Kissed filter presents brown and red colors to give that warm image atmosphere.
Step 4: Desaturate Video Clip

Now, you need to desaturate the video clip with Ash & Willow filters. We have typed Ash in the Search bar, and you can see the filter below. These filters are essential to desaturate the video with preset contrast, brightness, or exposure values.

Then, we have combined the black & white filter with an overlay of Film Reel Horizontal. It will help you sell the effect and make the video look more authentic. However, the only application of Black & White or Ash & Willow filters is not going to make any creative thing in terms of vintage videos. You have to mix overlays with features such as Random Dust or Film Reel Horizontal.
Step 5: Apply Black & White and Old Film Color Correction Presets to the video
You can also access the Advanced color correction Tab of Filmora from the Color button. It also features Preset and Adjusts Tabs to desaturate footage. The Preset presents a variety of options, including Black & White and Old Film. You just need to right-click the particular preset and select the Apply option.

Tips to Make Your Vintage Videos Stand Out
Following the helpful tips would assist you in creating awesome retro videos.
- You can use various vintage apps such as Retro VHS, RTRO Camera, 8mm, Camcorder, VSCO, etc. Or, despite using these limited apps, you can directly use our preferred video editing software called Wondershare Filmora.
- If you use a specific vintage camera, keep it on low highlights and low contrasts. Use color grading, as we have discussed above. They help to provide the ultimate old-school effect.
- Always keep low saturation settings for shooting vintage videos. Take control over Saturation, Hue, and Luminance of video.
- Add overlays and respective filters to recreate a required vintage look. You must add things that dust, scratch, and grain the heck out from the video that you have created.
- Lower the frame rate or FPS to create an excellent vintage look. You can make it to 18 or 14 FPS depending upon the aesthetic requirements.
- Keep an eye on black and white filters you have used. It’s because more of a black and white can ruin the actual vintage experience.
Conclusion
So, this is an ultimate tutorial on the creation of vintage videos. We Hope you have admired the steps and our recommended video editing software. Vintage means grand, and thus you should make it amazing as well. It is the reason we have stated all facts regarding the vintage effect in our post above. Wondering how to add such effect in FCPX? check this article:How to Create a Vignette in Final Cut Pro X?
Surely give a read and thank us later!
Richard Bennett
Richard Bennett is a writer and a lover of all things video.
Follow @Richard Bennett
Richard Bennett
Mar 27, 2024• Proven solutions
“Every accomplishment starts with a decision to try.” – A Vintage Thought
Vintage videos are ultimately the retro videos you have ever imagined. The look is highly inspirational in itself. The vintage effect in photography and videos results in a must-see look that everyone wants to capture all day long. The meaning of vintage is ‘the time when something of quality was produced.’ When something is called retro, it means old, recognized, and essential. Vintage also resembles love apart from videos and photos. All in all, it’s a positive and result-oriented thing to carry on in your videos. And this is what we want to mention in this post relating to the creation of vintage videos.
Here are some vintage-style video ideas for you to have a look at.
- Part 1: What to Consider When Shooting a Vintage Video?
- Part 2: How to Create a Stunning Vintage Video?
- Part 3: Tips to Make Your Vintage Videos Stand Out
What to Consider When Shooting a Vintage Video?
Vintage videos are kind of old school vibes and must be shooting accordingly by keeping in mind the following points. These are a sort of expert tips given by photographers based on their practical experience. First of all, you have to understand that a video can be made vintage, but you can’t change the actual environment of shooting. Some editing always involves there in every project out there. Still, the tips given below will help you a lot in creating a retro look.
Use Vintage Lenses
The very first helpful tip is to use a vintage lens. They allow chromatic aberration by distorting colors around the frame. Furthermore, you can find various kinds of lenses in terms of a vintage effect.
Decrease Contrast
Do the correct color grading by reducing the contrast a little bit. You must not level the retro videos in black or white or like-new videos. You can simply add a contrasting effect and then reduce it to have that vintage look.
Keep it a little soft
If you have ever noticed, the vintage videos are a little soft and look like degraded with time. It’s a result of decreased sharpness in the camera’s menu settings. You can even add a slight blur to the final video or simply use recognized software made for video editing .
Brighten up the black levels
Lots of black points in the video are not ideal for a vintage effect. The suitable approach is to bring up black levels and make it dark gray instead of inky black. This look can be achieved either by levels effect or curves effect in your editing software.
Reduce Saturation levels
Bringing down the saturation levels is another tip to create a vintage effect. The old videos are also absent in bright colors. Don’t go too crazy about reduction as 20%-30% saturation level is more than enough.
How to Create a Stunning Vintage Video?
What you need to get started as both beginner and professional is Wondershare Filmora Video Editor. It is a highly recommended software to create vintage videos. The intuitive user interface and lots of editing functions are helpful for a video editor. It has both primary as well as advanced editing programs to check. It has various advanced color tuning tools to promote the making of original videos. It features tint, temperature, Vignette, 3D Luts, Lights, and so on.
Steps for the vintage effect to videos on Wondershare Filmora Video Editor
Step 1: Upload video & make specific changes
The very step is to add the video by clicking the + icon. We have added the three sample videos from the library of Wondershare Filmora itself. Adjust them in the timeline as per your requirements.
After doing all the essential editing functions, click on the Effects tab given at the upper-left corner. Simply type the word Old in the Search tab.
The Old Video filter will immediately appear in the list of filters. Tap the “+” icon in Old Video filter to add to the timeline. Drag its ends right or left to adjust the duration.
Step 2: Apply White & Black Filters
The second step is to apply the Black & White filters. Go to the Effects tab and explore five Black & White filters available. Each of these filters is quite different and must be applied accordingly. Check the aesthetic of your video clip before any filter application to retro videos.
Step 3: Add the Sun Kissed or Sepia Tone Rise Filters to the video clip
There are various other categories of filters you can apply, such as Retro, Sun Kissed, and Sepia Tone, etc. The features of Filmora also present several subcategories such as Faux Film or Shake.
On the other hand, the subcategory of Sepia Tone features Sun-Kissed & Rise Filters to stimulate sepia-tinted texture and recreate the old visual style. The Sun Kissed filter presents brown and red colors to give that warm image atmosphere.
Step 4: Desaturate Video Clip
Now, you need to desaturate the video clip with Ash & Willow filters. We have typed Ash in the Search bar, and you can see the filter below. These filters are essential to desaturate the video with preset contrast, brightness, or exposure values.
Then, we have combined the black & white filter with an overlay of Film Reel Horizontal. It will help you sell the effect and make the video look more authentic. However, the only application of Black & White or Ash & Willow filters is not going to make any creative thing in terms of vintage videos. You have to mix overlays with features such as Random Dust or Film Reel Horizontal.
Step 5: Apply Black & White and Old Film Color Correction Presets to the video
You can also access the Advanced color correction Tab of Filmora from the Color button. It also features Preset and Adjusts Tabs to desaturate footage. The Preset presents a variety of options, including Black & White and Old Film. You just need to right-click the particular preset and select the Apply option.
Tips to Make Your Vintage Videos Stand Out
Following the helpful tips would assist you in creating awesome retro videos.
- You can use various vintage apps such as Retro VHS, RTRO Camera, 8mm, Camcorder, VSCO, etc. Or, despite using these limited apps, you can directly use our preferred video editing software called Wondershare Filmora.
- If you use a specific vintage camera, keep it on low highlights and low contrasts. Use color grading, as we have discussed above. They help to provide the ultimate old-school effect.
- Always keep low saturation settings for shooting vintage videos. Take control over Saturation, Hue, and Luminance of video.
- Add overlays and respective filters to recreate a required vintage look. You must add things that dust, scratch, and grain the heck out from the video that you have created.
- Lower the frame rate or FPS to create an excellent vintage look. You can make it to 18 or 14 FPS depending upon the aesthetic requirements.
- Keep an eye on black and white filters you have used. It’s because more of a black and white can ruin the actual vintage experience.
Conclusion
So, this is an ultimate tutorial on the creation of vintage videos. We Hope you have admired the steps and our recommended video editing software. Vintage means grand, and thus you should make it amazing as well. It is the reason we have stated all facts regarding the vintage effect in our post above. Wondering how to add such effect in FCPX? check this article:How to Create a Vignette in Final Cut Pro X?
Surely give a read and thank us later!
Richard Bennett
Richard Bennett is a writer and a lover of all things video.
Follow @Richard Bennett
Also read:
- [New] In 2024, Evade Robotic Ratings for Real-Time Traffic Surge
- [New] Kitchen Combatants 30 Pugnacious Food Show Titles
- [Updated] Craft the Ultimate Outro with Pro Maker Advice for 2024
- [Updated] In 2024, Elevate Video Performance Following the Path of Stars
- 2024 Approved Customize Your YouTube Experience with Altered Pace
- 2024 Approved Snap-Fying Life with FB Shorts
- 8 Ways to Transfer Photos from Motorola Edge 2023 to iPhone Easily | Dr.fone
- How to Transfer Photos from Samsung Galaxy F54 5G to New Android? | Dr.fone
- In 2024, 3 Ways to Fake GPS Without Root On Xiaomi Redmi 13C | Dr.fone
- In 2024, Is pgsharp legal when you are playing pokemon On Samsung Galaxy XCover 6 Pro Tactical Edition? | Dr.fone
- Reveling in the Highs of Nature with Garmin's Ultra 30
- Understanding How YouTube Processes Videos After They Are Uploaded for 2024
- Updated Top 8 Digital Audio Workstations (DAWs) Revolutionizing Contemporary Rap and R&B Creation for 2024
- Video Revenue Generation on Facebook Tactics for Financial Growth
- Title: Outlining Operational Offshoots for 2024
- Author: Steven
- Created at : 2024-12-20 16:36:00
- Updated at : 2024-12-24 16:30:59
- Link: https://facebook-record-videos.techidaily.com/outlining-operational-offshoots-for-2024/
- License: This work is licensed under CC BY-NC-SA 4.0.