![[New] 2024 Approved Expressiveness Enhancing YouTube Comments via Emojis](https://thmb.techidaily.com/e238ad00eb0e97c8dd57c3ad56e056f669853f2127f27582290858df483758e7.jpg)
"[New] 2024 Approved Expressiveness Enhancing YouTube Comments via Emojis"
Expressiveness: Enhancing YouTube Comments via Emojis
How to Add Emojis on YouTube Comments

Richard Bennett
Mar 27, 2024• Proven solutions
Emojis are a great way to make your videos and comments stand out from the rest. You may also be able to catch the attention of millennials and improve your YouTube and Google ranking. Beginners can use emojis as a great strategy to improve YouTube SEO performance and get ahead of others. Experts suggest using emojis wisely; that is not to overload or spam whole titles or comments with smileys!
Here are some great ways to add YouTube comments emojis:
Part 1: How to Type Emojis in a YouTube Comment on Windows
Here are several ways to type emojis in YouTube comments. Follow the instructions below to write YouTube comments with emojis:
1. Adding Emojis to YouTube Videos on Windows with Keyboard

If you are using Windows 10, then you can use the keyboard shortcut to open the emoji icons. Press Windows + ; (semi-colon) or Windows + . (period) to open the emoji keyboard. And you will see the emojis.
Currently, there are 6 types of emojis you can add on Windows, including smiley faces and animals, people, celebrities and objects, foods and plants, transportation and places, and symbols.
You can then click the emoji that you’d like to add to the YouTube video directly.
2. Copy and Paste Emojis from Websites
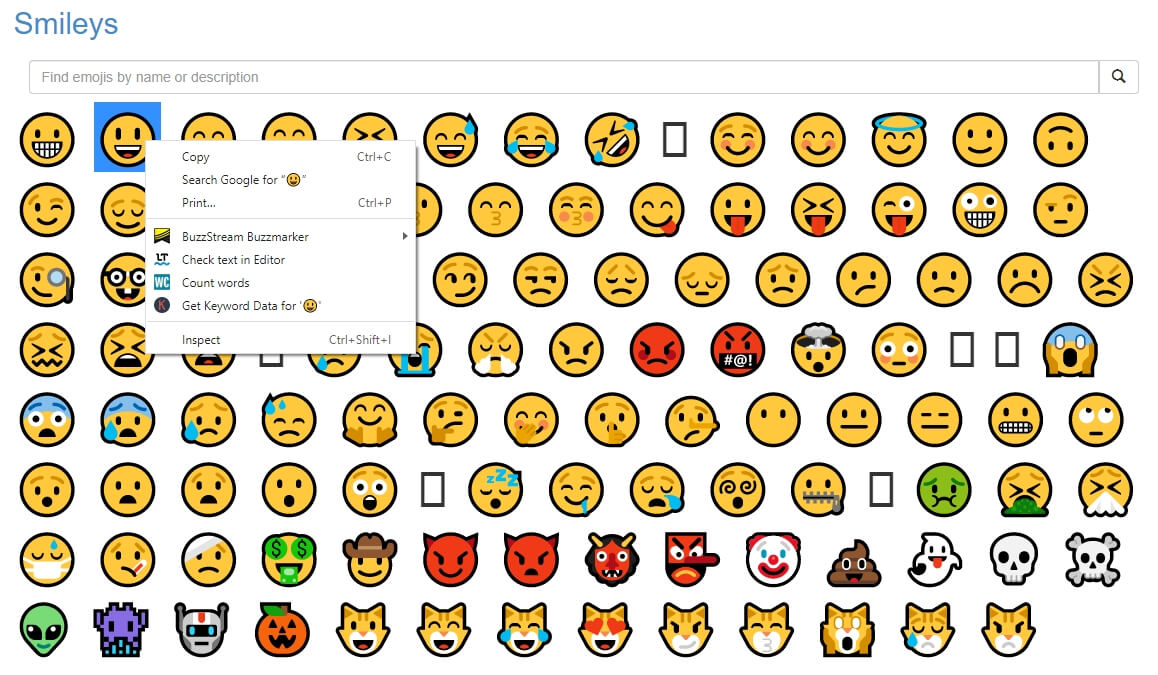
One of the easiest ways to add emojis to YouTube comments is to copy-paste them from an emoji database. You can right-click on the emoji and then select “copy.”
Now, go to your YouTube comment and right-click again. Scroll down and click on “paste” to use the emoji.
Here are some of the best websites to download emojis that you may need. In these websites, you can get a range of smileys and icons to use for your YouTube comments. You can start with smiley faces that help you express many emotions. Then you can get emojis of objects like cars, mountains, drinks, fruits, bells, guitars, and more.
The list is just endless, and you will never face any shortage of emojis.
Part 2: How to Add Emojis to YouTube Comments on Mac?
Mac users enjoy a wide selection of emojis without any hassles and can easily add emojis to comments they type on YouTube. Just follow the steps below to add emoji to YouTube comments.
You can select any emoji from the emoji resources website and ctrl-click your mouse to copy it. Now, navigate to your YouTube comment and ctrl-click your mouse. Click on “paste” to add the smiley to your comments.
If you want to use your keyboard, select the emoji and press “Command” and “C.” Now, press “Command” and “V” to paste the emoji in your YouTube comment.
Your emoji is now added to your YouTube comments.
You can also use your Mac’s inbuilt emojis in your YouTube comments. Start typing your YouTube comment and then use your keyboard shortcut Command + Control + Space to access the emoji list.
You can now double-click on any emoji to include it in your comment. The free emoji lists are full of smileys, animal faces, everyday objects and things, sports emojis, vehicles, and more. and more. You will find an emoji to suit every comment you type on YouTube.
If your Mac has a Touch Bar, then you can tap the smile face and then tap an emoji to add to YouTube video comments.
YouTuber Javier Mercedes has made a quick tutorial and introduced many more ways to typing emojis on Mac. Check it below and find the best way based on your preferences.
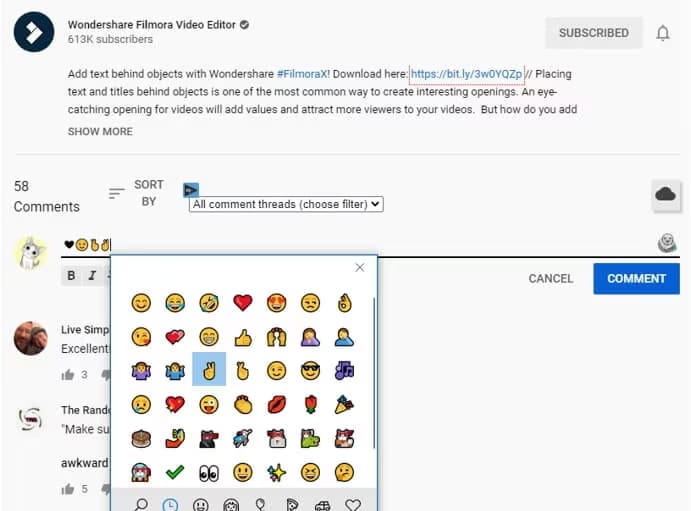
Part 3: How to Add Emoji to YouTube Comments with TubeBuddy?
TubeBuddy is a suite of tools for YouTubers to grow their success. You can access a range of tools, including YouTube comments emojis to improve your visual appeal. It is a free browser extension that you can add to Chrome, Opera, Firefox, and more.
TubeBuddy provides a large collection of emojis and smileys for you to use in your YouTube comments. Additionally, you don’t need to copy-paste anything. The plugin lets you insert emojis from a list with a click. Here are the steps to add emojis to YouTube comments using TubeBuddy:
Step 1: Install TubeBuddy
Visit the TubeBuddy website and install the plugin for your browser. TubeBuddy is available on both Chrome, FireFox, Opera, and Edge, as well as iOS and Android devices.
Step 2: Sign in to YouTube
Sign in to your YouTube account to allow TubeBuddy access to your comments. You will find the TubeBuddy icon beside the YouTube search bar on your browser.
Step 3: Add Emojis at Commenting
A window with a list of emojis will appear on YouTube as you type your comments. You can select any emoji and add it to your comments.
Types of Emojis in TubeBuddy
TubeBuddy is home to a large collection of emojis. You won’t find many emojis anywhere else on the internet. All emojis are grouped under categories like smileys, places, food and drinks, buildings, and more.
You can quickly select a category and then add emoji to YouTube comments. The tool also adds new emojis daily.
Bonus: How to Add Emojis to YouTube Video Title and Description?
You can add cool emojis to your video titles and descriptions for more innovation. People will also be more likely to choose your video as they pop-out on the search results or playlists.
Here is how you can add emojis to YouTube video titles and descriptions:
You can access any list of YouTube comments emojis and select the one you like. Then use your mouse to copy the emoji and paste it into your YouTube titles and description. Or press “Ctrl” + “C” for Windows and “Command” + “C” for Mac to copy your emoji.
Now go to your title or description and press “Ctrl” + “V” for Windows and “Command” + “V” for Mac to paste the emoji.
FAQs about YouTube Video Comments
- Are Emojis Harmful to Use for YouTube?
We all have heard rumors of using emojis in YouTube video titles or comments may damage views or reputation. However, it’s not true, and emojis have no negative consequences on YouTube.
Rather, you can attract more viewers and even improve YouTube SEO by using emojis. Google also allows emojis in search results, and data shows they rank better. You can use emojis for YouTube with complete peace of mind.
In my opinion, there will be no harmful effects on your views, subscribers, or credibility. Instead, you may be able to appeal to a younger crowd and get more clicks.
- Will adding Emojis Impact YouTube SEO?
Many people don’t use emojis in their YouTube videos, fearing a negative impact. But all the rumors out there are just rumors without any truth. YouTube doesn’t penalize you in any way if you use emojis in comments, titles, or descriptions. You will not experience any penal actions by including emojis on YouTube.
Google is also friendly with emojis, and many websites use them to stand apart from the crowd. Using emojis on YouTube can be an excellent way to improve your SEO performance. Your videos will also have a chance to show up on Google results and YouTube. Emojis also help your videos look innovative to draw in more views.
Final Thoughts
Using emojis in YouTube comments is a great way to boost the popularity of your videos. You can also use emojis in your video titles and descriptions to appear more innovative. Additionally, emojis can improve your YouTube SEO performance and even help you rank on Google search results.
Copy-pasting emojis is a simple way to use them, but you can also go for other methods. TubeBuddy is a great choice if you want to eliminate the whole copy-paste scenario and include more types of emojis in your comments directly.
Richard Bennett
Richard Bennett is a writer and a lover of all things video.
Follow @Richard Bennett
Mac Screen Alignment: Rapid Video Format Changes
Quick Resize YouTube Videos to Right Aspect Ratio on Mac

Liza Brown
Oct 26, 2023• Proven solutions
YouTube is one of the demanding platforms with more than 2.3 billion users worldwide as of 2021. And, in this digitally oriented world, you’re left with no reason not to create a YouTube channel specifically when you have the right talent to use one. Well, this guide is for those who are already into YouTube video creation and now need help on how to resize YouTube videos as per different aspect ratios. According to YouTube’s aspect ratio, it’s the right place to move forward even if you want to resize your videos present on other social media apps. We know brands and other influencers generally practice this kind of social media marketing.
So, let’s get started with our session on resizing YouTube as per the ideal aspect ratio without further ado.
Part 1: What’s the Right Aspect Ratio of YouTube Videos?
For attracting more audience and increasing engagement on YouTube videos, you have to look at each factor, along with the YouTube video quality. And, you cannot overlook the size of YouTube video among these factors to make it your perfect shot among competitors. Considering the importance of such factors, we’ve come up with this specific section on introducing you to the correct aspect ratio for YouTube videos.
It’s crucial to know the size before you start the YouTube game!
YouTube allows you to upload videos of different sizes ranging from 240p to 8K. And, the dimensions for these different sizes are as follows.
- 240p: 426x240 pixels
- 360p: 640x360 pixels
- 480p: 854x480 pixels
- 720p: 1280x720 pixels
- 1080p: 1920x1080 pixels
- 1440p: 2560x1440 pixels
- 2160p: 3840x2160 pixels
- 43200p: 7680×4320 pixels
Along with these, the aspect ratio, video size, and length of YouTube video should also be taken into consideration while uploading YouTube videos.
Thus, the ideal aspect ratio to resize YouTube video is perfect as 16:9, which we’ll diversify in the following three sections.
1. Computer
On a computer, the standard aspect ratio for YouTube video is 16:9. And, the YouTube player will automatically adjust other aspect ratios than the standard size. For instance, it may add padding of white or gray color depending upon the theme. However, it’s advisable to avoid these things like padding as they interfere with YouTube’s dynamic adjustments.
2. Android Phone
In the Android application, the scenario is quite different from YouTube videos. The app automatically adjusts the player as per the video size. The video will always fit the screen, whether it’s square, vertical, or horizontal. Ultimately, the videos will be shorter for widescreen and square for vertical.
3. iPad & iPhone
Similarly, the YouTube app for iPad and iPhone automatically adjust the video size to fit the screen. Thus, every video will fit the screen, even if it’s square, horizontal, or vertical.
Before we let you know how to resize YouTube videos, here are some tips for creating awesome YouTube videos.
- Create a strategy for YouTube video beforehand.
- Search for ideas and topics.
- Understand the use of the best equipment and gear.
- Ensure the best YouTube video editing.
- Optimize YouTube videos.
Part 2: Automatically Resize YouTube Videos to Right Aspect Ratio with Wondershare Filmora for Mac
Hopefully, you have noted the correct aspect ratio required for YouTube videos. Now, it’s time to understand the quick process on how to resize YouTube videos as per this aspect ratio via Wondershare Filmora for Mac. Yes, the Filmora Mac’s latest version, 10.2, has recently launched a competitive feature - Auto Reframe. The feature automatically adjusts your video as per the selected aspect ratio and fits the video’s motion element quite instantly.
About Wondershare Filmora for Mac
Wondershare Filmora is one of the robust video editing programs containing both primary and advanced tools such as Motion Tracking, Keyframing, Green Screen, Audio Ducking, Color Matching, Auto Reframe, and so on.


Steps to Use Auto Reframe in Wondershare Filmora for Mac to Resize YouTube Videos
Step 1. Click the “Try It Free” button to download its latest version and launch it.
Step 2. Choose the More Tools > Auto Reframe after launching the Wondershare Filmora for Mac.

Step 3. Hit the Import button to upload a YouTube video for its resizing.

Step 4. Choose among five different aspect ratios, namely the Vertical, Square, Widescreen, Standard, and Cinema.

Tap the eye icon and preview the whole video.

Step 5. Toggle the Adjust frame tab and adjust the YouTube video screen as shown below.

It is present before the Advanced tab.
Then, adjust the Advanced settings, namely the Tracking Subject and Tracking Speed.

Step 6. Hit the Export tab to save the cropped video.

You can also upload the reframed video to Filmora for further editing.
Conclusion
So, this’s all about how to resize YouTube videos in its ideal aspect ratio. Right from the beginning, we’ve discussed the importance of creating YouTube videos in this digital transformation age and further considering the right fit of factors, including the size, length, quality, and aspect ratio of specific YouTube videos. Even though YouTube has the facility to adjust the video automatically, you have to edit in the cropped video, which is possible through integrated editing programs such as the one we’ve discussed above via Wondershare Filmora for Mac. This video editing software is quite remarkable and offers all the competitive features that both basic and advanced video editors need.
Liza Brown
Liza Brown is a writer and a lover of all things video.
Follow @Liza Brown
Also read:
- [New] 2024 Approved Elevating Your Content Powerful Tags to Watch Out For
- [New] In 2024, Essential ASMR Channel Discoveries
- [New] Simplified Guide to IPhone Display Recordings for 2024
- [New] YouTube to WebM Top-Tier Conversion Applications Reviewed
- [Updated] Cutting-Edge Content Summit for 2024
- 2024 Approved Practical Routines for Streamlining GoToMeeting Session Logging
- A Quick Guide to Vivo S17t FRP Bypass Instantly
- Essential Study Aid Apps: The Top 6 Selections for Kids & Their Families
- Fixed Windows 11 - Enhanced Control Over Resolutions
- Ideal Matches Mac & PC Video Decoders (FREE/PAID)
- In 2024, Mastering Tags The Ultimate Guide for Video Optimization
- Tune-Tastic Transfers Find Your Favorite Youtube Songs with Top 6 Free Android Apps for 2024
- Title: [New] 2024 Approved Expressiveness Enhancing YouTube Comments via Emojis
- Author: Steven
- Created at : 2024-10-24 19:56:44
- Updated at : 2024-10-29 18:42:54
- Link: https://facebook-record-videos.techidaily.com/new-2024-approved-expressiveness-enhancing-youtube-comments-via-emojis/
- License: This work is licensed under CC BY-NC-SA 4.0.