![[New] 2024 Approved Are There Legal Restrictions to Recording YouTube Videos?](https://thmb.techidaily.com/d24f731fb7d4e16e9e3dad20fbd83add26d8b00ef3415c454c76fbd282fafbfc.jpg)
"[New] 2024 Approved Are There Legal Restrictions to Recording YouTube Videos?"
Are There Legal Restrictions to Recording YouTube Videos?
YouTube is currently the most useful video streaming platform. This platform has a wide range of amazing videos that make it one of the most subscribed platforms in the world today. This is why thousands of people do screen recordings on YouTube every day for various uses. Some of them record content to use in studies, to share with friends, for offline entertainment and other acceptable ways. There are those that record YouTube content, edit and re-upload it in their own accounts.
However, since YouTube is the most streaming platform in the world today, it has set guidelines and strict rules to be followed to make sure that people do not misuse the platform at all. The YouTube content is protected by US copyright law, and it indicates that any form of recording or conversion of this copyrighted content is illegal. Other issues related to video and audio recording come from various copyright laws and intellectual property rights.
Is Screen Recording YouTube Illegal?
The legality and illegality of recording YouTube content depend on the purpose of recording. It is absolutely legal to record videos for personal purposes such as sharing content with your friends or keeping them for offline enjoyment.
However, if you have been asking is screen recording on YouTube illegal? Yes it is, if your aim is other than the mentioned above. Some people record YouTube videos for malicious purposes such as reuploading them on YouTube or on other platforms to earn money from it. Such acts are illegal and are punishable.
If YouTube detects any illegal upload, it will suspend the subscriber’s account. The illegal content is removed from the YouTube platform within 24 hours. It is advisable for all the users to comply with the set policy strictly and do the screen recording in legal ways and allowed purposes. Before recording any content on YouTube, you must ask yourself this question first; is screen recording on YouTube illegal?

How to Record YouTube Videos
With the above in mind, it is important to know how to record YouTube videos on PC in the right way. To be able to record the videos in the right way, you need to use one of the many available screen recording programs available in the market today.
However, since there are many screen recording programs available that can record YouTube videos with audio, it is important to choose the most suitable for your tasks. Filmora is an all-in-one video and audio recorder capable of recording, editing, and converting videos without losing quality. This software is quite intuitive and very easy to use. By choosing Filmora, you are halfway to knowing if; it is illegal to record music from YouTube. This is because it is a YouTube supporting program. Filmora is a recording and editing tool with many features to help you know how to record YouTube videos on pc. Such are;
- Screen recording
- Audio duking.
- Screen detection.
- Video stabilization.
- Export to YouTube and Vimeo.
- Green screen support.
- Media library.
- GIF support.
- Record HD video in 4K/1080P/720p, support frame
- Previewing rendering
- Silence detection.
- Auto-ripple.
- Split-screen presets.
- Advanced text editing.
- Tilt-shift.
- Chroma key.
- Video and audio control.
- Auto mix.
Follow the following steps when you want to record screen with Wondershare Filmora;
Step1: Download and install Wondershare Filmora.
If you do not have this software installed on your computer, you need to start by downloading and installing it on your device and then launch it. Having downloaded Filmora, you are halfway to knowing whether it is legal or is it illegal to record music from YouTube.
For Win 7 or later (64-bit)
For macOS 10.12 or later
Step 2: Launch Filmora.

Now that you have installed this software, launch the Wondershare Filmora program and the main interface of the Filmora application will pop up to get you to the recording options. This interface has about four options; Audio reframe, Audio Best Sync, PC screen, and AI portrait. All these are set to make your work easier when recording videos and audio. Click on the new project from the welcome screen.
Step 3: Click on the record PC screen option.
 Software Update Pro - Check and update software installed on your computer.

You can customize your recording options to suit your interest and then open your browser and open the YouTube video you want to record. After this is done, click on the red button to start recording the screen. Now you are aware of the steps you need to take when you want to record a YouTube video with audio.

How to Edit Recorded YouTube Video
Regardless of the software, you are using to edit your YouTube videos, there are common steps that you can follow to make your journey a success. Filmora is efficient and reliable software that you can easily operate when editing your videos. This is why I will take you through the steps that you need to take when editing YouTube videos with this program.
Step 1: Split or combine your video clips
Just like other alternative editing programs, the Wondershare Filmora video editing program has a timeline view of the project you are working on. This is where you can cut or drop your shots as each of the shots are in separate files that you should combine with others to make one complete video.

Filmora has an effective split feature, that can help you cut footage into parts, and after, you can move the splits into the correct position or delete the unwanted parts. The Quick Trim feature can help you to choose any part of your video quickly when previewing.
Filmora supports almost all the formats used to make videos and photos and this will help you reduce obstacles when you want to combine footage shot with different devices. With such capabilities, it is easy to add video clips, photos, and audio when editing Your YouTube Videos.
For you to combine several footages into one, you need to place all clips in the video track in an orderly way. Then set the timeline view and move the shots around, cut or trim to shorten as you prefer. To give your final production a professional look, you can add transitions between shots.
Step 2: Rotate, Crop, Pan, and Zoom

At this point, you can rotate the video at any angle, or direction and you can as well change the scale of your video footage. If you want the viewers to focus on a certain part of the video frame, apply the Pan & Zoom feature.
Step 3: Add audio, texts, and more effects.
.png) Kanto Player Professional
Kanto Player Professional
Now that you have edited your different video shots into a single video, you can now take the step of adding some more effects to your video. At this point, you can add different staff such as music, texts, and different other effects that you would prefer your viewers to see in your video. Some may think this is difficult to do if they have not tried it before.
The Wondershare Filmora screen editor has appropriate features to help you add all the effect you need without wasting time at all. This program will guide you through how to add effects to your YouTube videos. This is an important step in answering the question asked by many; is it illegal to record music from YouTube? If you adhere to YouTube rules and policy, you can incorporate music and other effects into your YouTube videos without fear.
Step 4: Save and Export

After adding all the special effects, you are almost at the final stage. The next important thing to do is to choose the format of saving your video file. After making sure that your video format is set, and then you can export your video file.
Remember to save your file in a format acceptable to the platform that you are intending to upload your videos. Some of the major video formats accepted by YouTube include MP4, AVI, and VMA. You can use any of these formats to save your YouTube video files.
You don’t need to upload your videos later as the Filmora features will allow you to upload YouTube videos directly. It will choose the appropriate format, frame, and codec that suit your video files.
When editing your YouTube videos on your computer, remember to follow the above steps carefully, and remember to use the right widescreen format, and render your video files in either 1080p or 720p high definition.
Having equipped yourself with such knowledge, you can download the Filmora software and install it on your computer as it is one of the very best software when it comes to recording and editing videos and audio.
Conclusion
Now you know what to do and what not to do when it comes to recording and editing YouTube videos. Remember, for you to avoid problems with the YouTube platform, work in the brackets of the set policy. Find the right and fitting video editor such as Filmora to assist you in recording and editing videos for YouTube. There are many Filmora tutorial guides that can help you know how to download and install it on your PC.
Follow the following steps when you want to record screen with Wondershare Filmora;
Step1: Download and install Wondershare Filmora.
If you do not have this software installed on your computer, you need to start by downloading and installing it on your device and then launch it. Having downloaded Filmora, you are halfway to knowing whether it is legal or is it illegal to record music from YouTube.
For Win 7 or later (64-bit)
For macOS 10.12 or later
Step 2: Launch Filmora.
Now that you have installed this software, launch the Wondershare Filmora program and the main interface of the Filmora application will pop up to get you to the recording options. This interface has about four options; Audio reframe, Audio Best Sync, PC screen, and AI portrait. All these are set to make your work easier when recording videos and audio. Click on the new project from the welcome screen.
Step 3: Click on the record PC screen option.
You can customize your recording options to suit your interest and then open your browser and open the YouTube video you want to record. After this is done, click on the red button to start recording the screen. Now you are aware of the steps you need to take when you want to record a YouTube video with audio.
 Power Tools add-on for Google Sheets, 12-month subscription
How to Edit Recorded YouTube Video
Regardless of the software, you are using to edit your YouTube videos, there are common steps that you can follow to make your journey a success. Filmora is efficient and reliable software that you can easily operate when editing your videos. This is why I will take you through the steps that you need to take when editing YouTube videos with this program.
Step 1: Split or combine your video clips
Just like other alternative editing programs, the Wondershare Filmora video editing program has a timeline view of the project you are working on. This is where you can cut or drop your shots as each of the shots are in separate files that you should combine with others to make one complete video.
Filmora has an effective split feature, that can help you cut footage into parts, and after, you can move the splits into the correct position or delete the unwanted parts. The Quick Trim feature can help you to choose any part of your video quickly when previewing.
Filmora supports almost all the formats used to make videos and photos and this will help you reduce obstacles when you want to combine footage shot with different devices. With such capabilities, it is easy to add video clips, photos, and audio when editing Your YouTube Videos.
For you to combine several footages into one, you need to place all clips in the video track in an orderly way. Then set the timeline view and move the shots around, cut or trim to shorten as you prefer. To give your final production a professional look, you can add transitions between shots.
Step 2: Rotate, Crop, Pan, and Zoom
At this point, you can rotate the video at any angle, or direction and you can as well change the scale of your video footage. If you want the viewers to focus on a certain part of the video frame, apply the Pan & Zoom feature.
Step 3: Add audio, texts, and more effects.
Now that you have edited your different video shots into a single video, you can now take the step of adding some more effects to your video. At this point, you can add different staff such as music, texts, and different other effects that you would prefer your viewers to see in your video. Some may think this is difficult to do if they have not tried it before.
The Wondershare Filmora screen editor has appropriate features to help you add all the effect you need without wasting time at all. This program will guide you through how to add effects to your YouTube videos. This is an important step in answering the question asked by many; is it illegal to record music from YouTube? If you adhere to YouTube rules and policy, you can incorporate music and other effects into your YouTube videos without fear.
Step 4: Save and Export
After adding all the special effects, you are almost at the final stage. The next important thing to do is to choose the format of saving your video file. After making sure that your video format is set, and then you can export your video file.
Remember to save your file in a format acceptable to the platform that you are intending to upload your videos. Some of the major video formats accepted by YouTube include MP4, AVI, and VMA. You can use any of these formats to save your YouTube video files.
You don’t need to upload your videos later as the Filmora features will allow you to upload YouTube videos directly. It will choose the appropriate format, frame, and codec that suit your video files.
When editing your YouTube videos on your computer, remember to follow the above steps carefully, and remember to use the right widescreen format, and render your video files in either 1080p or 720p high definition.
Having equipped yourself with such knowledge, you can download the Filmora software and install it on your computer as it is one of the very best software when it comes to recording and editing videos and audio.
Conclusion
Now you know what to do and what not to do when it comes to recording and editing YouTube videos. Remember, for you to avoid problems with the YouTube platform, work in the brackets of the set policy. Find the right and fitting video editor such as Filmora to assist you in recording and editing videos for YouTube. There are many Filmora tutorial guides that can help you know how to download and install it on your PC.
Follow the following steps when you want to record screen with Wondershare Filmora;
Step1: Download and install Wondershare Filmora.
If you do not have this software installed on your computer, you need to start by downloading and installing it on your device and then launch it. Having downloaded Filmora, you are halfway to knowing whether it is legal or is it illegal to record music from YouTube.
For Win 7 or later (64-bit)
For macOS 10.12 or later
Step 2: Launch Filmora.
Now that you have installed this software, launch the Wondershare Filmora program and the main interface of the Filmora application will pop up to get you to the recording options. This interface has about four options; Audio reframe, Audio Best Sync, PC screen, and AI portrait. All these are set to make your work easier when recording videos and audio. Click on the new project from the welcome screen.
Step 3: Click on the record PC screen option.
You can customize your recording options to suit your interest and then open your browser and open the YouTube video you want to record. After this is done, click on the red button to start recording the screen. Now you are aware of the steps you need to take when you want to record a YouTube video with audio.
How to Edit Recorded YouTube Video
Regardless of the software, you are using to edit your YouTube videos, there are common steps that you can follow to make your journey a success. Filmora is efficient and reliable software that you can easily operate when editing your videos. This is why I will take you through the steps that you need to take when editing YouTube videos with this program.
Step 1: Split or combine your video clips
Just like other alternative editing programs, the Wondershare Filmora video editing program has a timeline view of the project you are working on. This is where you can cut or drop your shots as each of the shots are in separate files that you should combine with others to make one complete video.

Filmora has an effective split feature, that can help you cut footage into parts, and after, you can move the splits into the correct position or delete the unwanted parts. The Quick Trim feature can help you to choose any part of your video quickly when previewing.
Filmora supports almost all the formats used to make videos and photos and this will help you reduce obstacles when you want to combine footage shot with different devices. With such capabilities, it is easy to add video clips, photos, and audio when editing Your YouTube Videos.
For you to combine several footages into one, you need to place all clips in the video track in an orderly way. Then set the timeline view and move the shots around, cut or trim to shorten as you prefer. To give your final production a professional look, you can add transitions between shots.
Step 2: Rotate, Crop, Pan, and Zoom
At this point, you can rotate the video at any angle, or direction and you can as well change the scale of your video footage. If you want the viewers to focus on a certain part of the video frame, apply the Pan & Zoom feature.
Step 3: Add audio, texts, and more effects.
Now that you have edited your different video shots into a single video, you can now take the step of adding some more effects to your video. At this point, you can add different staff such as music, texts, and different other effects that you would prefer your viewers to see in your video. Some may think this is difficult to do if they have not tried it before.
The Wondershare Filmora screen editor has appropriate features to help you add all the effect you need without wasting time at all. This program will guide you through how to add effects to your YouTube videos. This is an important step in answering the question asked by many; is it illegal to record music from YouTube? If you adhere to YouTube rules and policy, you can incorporate music and other effects into your YouTube videos without fear.
Step 4: Save and Export
After adding all the special effects, you are almost at the final stage. The next important thing to do is to choose the format of saving your video file. After making sure that your video format is set, and then you can export your video file.
Remember to save your file in a format acceptable to the platform that you are intending to upload your videos. Some of the major video formats accepted by YouTube include MP4, AVI, and VMA. You can use any of these formats to save your YouTube video files.
You don’t need to upload your videos later as the Filmora features will allow you to upload YouTube videos directly. It will choose the appropriate format, frame, and codec that suit your video files.
When editing your YouTube videos on your computer, remember to follow the above steps carefully, and remember to use the right widescreen format, and render your video files in either 1080p or 720p high definition.
Having equipped yourself with such knowledge, you can download the Filmora software and install it on your computer as it is one of the very best software when it comes to recording and editing videos and audio.
 Power Tools add-on for Google Sheets, Lifetime subscription
Conclusion
Now you know what to do and what not to do when it comes to recording and editing YouTube videos. Remember, for you to avoid problems with the YouTube platform, work in the brackets of the set policy. Find the right and fitting video editor such as Filmora to assist you in recording and editing videos for YouTube. There are many Filmora tutorial guides that can help you know how to download and install it on your PC.
Follow the following steps when you want to record screen with Wondershare Filmora;
Step1: Download and install Wondershare Filmora.
If you do not have this software installed on your computer, you need to start by downloading and installing it on your device and then launch it. Having downloaded Filmora, you are halfway to knowing whether it is legal or is it illegal to record music from YouTube.
For Win 7 or later (64-bit)
For macOS 10.12 or later
Step 2: Launch Filmora.
 The Tube Sites Submitter is a fast and efficient tool for anyone who needs to upload videos quickly, easily and automatically to hundreds of tube sites in mere minutes .
Now that you have installed this software, launch the Wondershare Filmora program and the main interface of the Filmora application will pop up to get you to the recording options. This interface has about four options; Audio reframe, Audio Best Sync, PC screen, and AI portrait. All these are set to make your work easier when recording videos and audio. Click on the new project from the welcome screen.
Step 3: Click on the record PC screen option.
You can customize your recording options to suit your interest and then open your browser and open the YouTube video you want to record. After this is done, click on the red button to start recording the screen. Now you are aware of the steps you need to take when you want to record a YouTube video with audio.
How to Edit Recorded YouTube Video
Regardless of the software, you are using to edit your YouTube videos, there are common steps that you can follow to make your journey a success. Filmora is efficient and reliable software that you can easily operate when editing your videos. This is why I will take you through the steps that you need to take when editing YouTube videos with this program.
Step 1: Split or combine your video clips
Just like other alternative editing programs, the Wondershare Filmora video editing program has a timeline view of the project you are working on. This is where you can cut or drop your shots as each of the shots are in separate files that you should combine with others to make one complete video.
Filmora has an effective split feature, that can help you cut footage into parts, and after, you can move the splits into the correct position or delete the unwanted parts. The Quick Trim feature can help you to choose any part of your video quickly when previewing.
Filmora supports almost all the formats used to make videos and photos and this will help you reduce obstacles when you want to combine footage shot with different devices. With such capabilities, it is easy to add video clips, photos, and audio when editing Your YouTube Videos.
For you to combine several footages into one, you need to place all clips in the video track in an orderly way. Then set the timeline view and move the shots around, cut or trim to shorten as you prefer. To give your final production a professional look, you can add transitions between shots.
Step 2: Rotate, Crop, Pan, and Zoom
At this point, you can rotate the video at any angle, or direction and you can as well change the scale of your video footage. If you want the viewers to focus on a certain part of the video frame, apply the Pan & Zoom feature.
Step 3: Add audio, texts, and more effects.
Now that you have edited your different video shots into a single video, you can now take the step of adding some more effects to your video. At this point, you can add different staff such as music, texts, and different other effects that you would prefer your viewers to see in your video. Some may think this is difficult to do if they have not tried it before.
The Wondershare Filmora screen editor has appropriate features to help you add all the effect you need without wasting time at all. This program will guide you through how to add effects to your YouTube videos. This is an important step in answering the question asked by many; is it illegal to record music from YouTube? If you adhere to YouTube rules and policy, you can incorporate music and other effects into your YouTube videos without fear.
Step 4: Save and Export
After adding all the special effects, you are almost at the final stage. The next important thing to do is to choose the format of saving your video file. After making sure that your video format is set, and then you can export your video file.
Remember to save your file in a format acceptable to the platform that you are intending to upload your videos. Some of the major video formats accepted by YouTube include MP4, AVI, and VMA. You can use any of these formats to save your YouTube video files.
You don’t need to upload your videos later as the Filmora features will allow you to upload YouTube videos directly. It will choose the appropriate format, frame, and codec that suit your video files.
When editing your YouTube videos on your computer, remember to follow the above steps carefully, and remember to use the right widescreen format, and render your video files in either 1080p or 720p high definition.
Having equipped yourself with such knowledge, you can download the Filmora software and install it on your computer as it is one of the very best software when it comes to recording and editing videos and audio.
 vMix HD - Software based live production. vMix HD includes everything in vMix Basic HD plus 1000 inputs, Video List, 4 Overlay Channels, and 1 vMix Call
Conclusion
Now you know what to do and what not to do when it comes to recording and editing YouTube videos. Remember, for you to avoid problems with the YouTube platform, work in the brackets of the set policy. Find the right and fitting video editor such as Filmora to assist you in recording and editing videos for YouTube. There are many Filmora tutorial guides that can help you know how to download and install it on your PC.
Why Choose AV1 for YouTube? – Unlock Potential
Do you notice that many YouTube videos have been streamed in AV1? YouTube AV1 just happened suddenly a few years ago. This article will inform you about all the things you want to know about AV1 Youtube settings. I will let you know the tutorial to turn in AV1 settings on YouTube and the reason why should choose AV1 along with the others, and some more things about AV1.

Part 1: How to turn on AV1 settings on YouTube?
Do you wonder how to turn on AV1 settings on YouTube? For your information, AV1 is a video codec that is developed by a consortium of companies. It offers you advanced compression, enabling you to do smoother HD streaming and data savings for the video. Google also has already implemented AV1 use on YouTube. To turn on AV1 settings on YouTube, here are the steps:
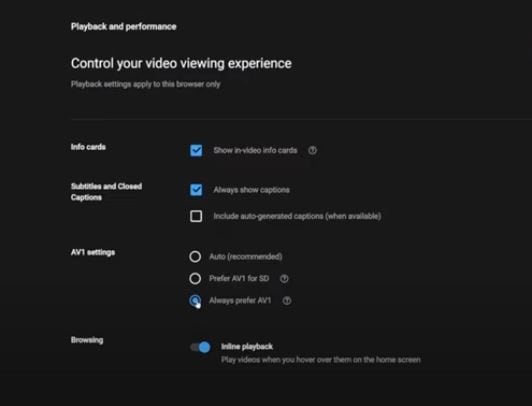
Step1Go to playback and performance
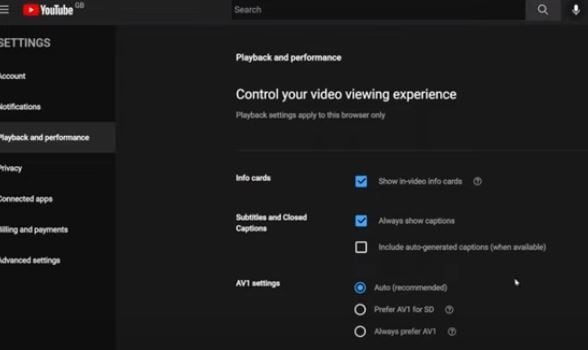
- To turn on the AV1 settings, go to your YouTube account, after that click “Playback and Performance”.
- In the AV1 settings. Besides “Auto (Recommended)”, there are other two options, which are “Prefer AV1 for SD” and also “Always prefer SD”.
- “Always Prefer AV1” uses the codec whenever it is available for a video while “Prefer AV1 for SD” limits it to SD videos. There are two options to avoid low-performance devices when AV1 videos are played on YouTube. You can select “Always Prefer AV1” to see if your device performance is good enough when you play videos on YouTube that support AV1.
Step2Test if the AV1 settings are already enabled in your video

You may ask how to confirm your YouTube videos are playing with AV1 Codec. Well, you can search playlist on YouTube with the keywords “4K, 5K, and 8K videos with the new AV1 Codec “. You can test it by playing one of the videos. You have to right-click on the media player and then select “Stats for nerd”. If it shows the av01 codec there, then the AV1 settings are enabled already.

Part 2: Why choose AV1 over VP9 and other formats?
Now, do you need a reason why you should choose AV1 compared to VP9 and the others? As you know, there is also another video codec like VP9. There are also the others such as VVC, and many more. So what is the superiority of AV1 over the others? I will let you know why you should choose AV1 in this part.
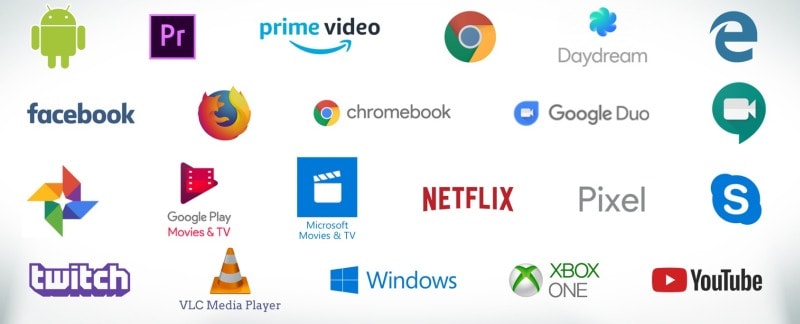
The main thing is, as mentioned before, AV1 is developed by a consortium of companies founded in 2015. It is supported by The Alliance for Open Media (AOMedia) such as Amazon, Facebook, Google, Microsoft, and Netflix, and also by web browser developers and semiconductor firms. Aomedia made it clear the algorithm is free-to-use. It means that there are no greedy negotiators that will be dependent on the developers.
Also, these days, with a format that provides a much smaller workload for internet providers. Their today focus is, that AV1 can reach the quality but can get the job done with 20% more efficiency. Then, with AV1 encoding, a “standard” 4K movie will be much more accessible than it is now. These are some more reasons why you should choose AV1.
1. Royalty-free
As mentioned before, AV1 is royalty-free. AV1 is such a next-generation of royalty video codec. It means that it is not just free to use, but also free of charge, obligations, or even liability. It is an open and royalty-free video codec that the video platform will not charge to pay royalties to the Moving Picture Experts Group (MPEG), the developer of video codecs.
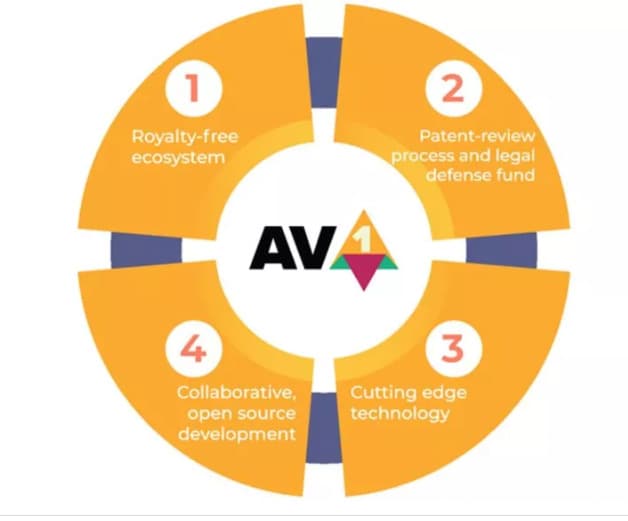
When it comes to the group that will ask for the royalty, MPEG is not the only one. There are also other patent groups and companies that can ask for it. Aomedia integrated Google, Mozilla, and Cisco, while they were busy creating their new video codec. However, the three companies joined together to create one codec to beat them all.
2. Better performance
It is said that the AV1 codec is 30% more efficient. According to the tests conducted by Moscow State University, AV1 can outperform AV1 by about 28% in the efficiency of encoding and decoding. As per the performance graph from the Graphics & Media Lab Video Group, MSU below, AV1 can offer the exactly same quality as X264 at 55% of the average bitrate.
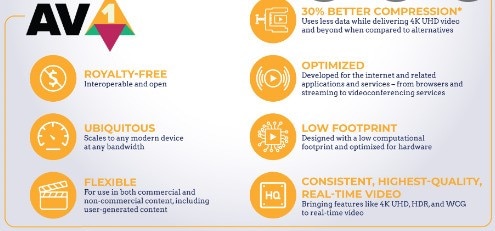
AV1 is designed so exclusively to function better than all the other codecs in the market. It is an open-sourced codec with simple patent licensing, and the integration manages to save, as mentioned, up to 30% of the bandwidth for the exactly same image quality. In other words, with AV1, distributors can send streams much faster and cheaper and we can enjoy higher definitions in the same bandwidth.
3. AV2 to come in the future
AV1 is undoubtedly superior if we compare it to other available video codecs and the exploration of the codec technology AV2 has already begun. This is such an early performance evaluation. There is some interesting part of the exploration development of AV2, such as multiple line selection for Intra prediction can make you select not just neighboring row/column for directional prediction. The same tool also exists in VVC.
There are also three essential improvements, which are simplifying the existing feature (also complete removal) and picking the tool used by VVC/H.266 (It is lack originality but so much work on it) and improvement periodically improvement of an existing tool, it is too few and also not original. We haven’t known yet when AV2 will be done completely though, maybe there still be some more essential improvements.

Part 3: What’s the best video editor for YouTubers with AV1 format?
When we talk about YouTube, it feels incomplete if we don’t talk about the video editor. So, what is the best video editing software for YouTubers with AV1 format? Yes, it is Filmora . It is such a great video editing software that allows you to import and edit many video file formats. Filmora also allows users to export AV1 MP4 format video and then can directly upload it to YouTube.

Filmora gives some ways to export your videos. Here are the five ways. You can also customize the export settings then you can save them to reuse the same settings next time. The first is you can export your project file and video to the local computer. It supports export as MP4, AVI, WMV, AV1, MOV, GoPro Cineform, F4V, MKV, TS, and 3GP.
After that, you can export your video to any device you want, such as iPhone, iPad, Apple TV, Apple TV 4K, iPod, Samsung Galaxy, Smart Phone, Android Generic, Google Pixel, Xbox One, PlayStation 4, PSP, and Smart TV. Then you can upload it to YouTube, Filmora provides you to export your video to Youtube directly. All you need to do is logging your Youtube account and export.
Free Download For Win 7 or later(64-bit)
Free Download For macOS 10.14 or later
 vMix Pro - Software based live production. vMix Pro includes everything in vMix 4K plus 8 channels of Replay and 8 vMix Call
Part 4: FAQ: Does YouTube use AV1 or VP9?
For today, YouTube encodes all the videos with the VP9 codec, but for some reason displays for low view count videos. AV1 usage also had been pushed to very low view counts. When it comes to cost or quality tradeoffs, AV1 took about 18 times longer to encode than x264.
Free Download For macOS 10.14 or later
Part 4: FAQ: Does YouTube use AV1 or VP9?
For today, YouTube encodes all the videos with the VP9 codec, but for some reason displays for low view count videos. AV1 usage also had been pushed to very low view counts. When it comes to cost or quality tradeoffs, AV1 took about 18 times longer to encode than x264.
- Title: [New] 2024 Approved Are There Legal Restrictions to Recording YouTube Videos?
- Author: Steven
- Created at : 2024-07-30 21:52:02
- Updated at : 2024-07-31 21:52:02
- Link: https://facebook-record-videos.techidaily.com/new-2024-approved-are-there-legal-restrictions-to-recording-youtube-videos/
- License: This work is licensed under CC BY-NC-SA 4.0.